Serial vs Parallel Assignments
As a project manager, we are often faced with a decision on how to allocate resources across multiple projects/tasks. Is it better to focus your resources on one project, full time (i.e. 100% utilization) until it is complete or should you spread your resources across multiple projects, working the projects/tasks in parallel? This is a basic question of Resource Management: Serial vs Parallel Assignments? Let’s review the pros and cons of each option and show you how to configure each option within your project schedule.
Scenario: We have 3 projects/tasks that need to be assigned to a resource. Each project/task is estimated at 160h of Work.
Option 1: Serial task assignment.
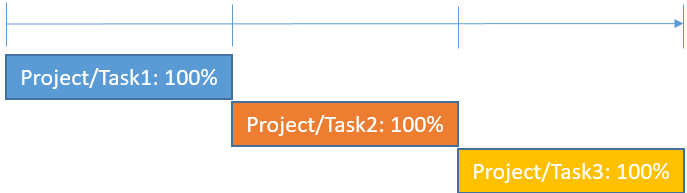
Serial processing is the act of attending to and processing one task at a time. The project/tasks are worked in serial fashion, with the resource focused on a single project/task with a 100% allocation. The resource will move on to the preceding task when the higher prior task is complete.
Pros:
- The Project Resource can focus their effort on a single task at a time with 100% emphasis
- Notice you will complete Project/Task1 and Project/Task2 prior to end of the 3 month period. The stakeholders are going to see tasks completed at the end of each month.
- All projects/tasks are scheduled to be completed at the end of the 3 month period
Cons:
- Project/Task2 and Project/Task3 are not started at the beginning of the 3 month period. You will need to inform your stakeholders of why all tasks have not started immediately and manage their expectations.
Project Professional Configuration:
For tasks within the same project:
- Establish the tasks within the project.
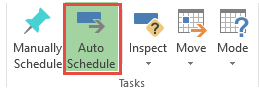
- Verify all the tasks are setup for Auto Schedule. To Auto Schedule, click on the Task tab, select all the tasks and click the Auto Schedule button.
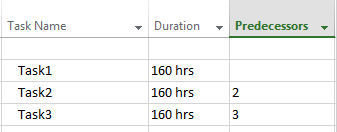
3. Establish Predecessors within each task with a Finish-to-Start (FS) type.
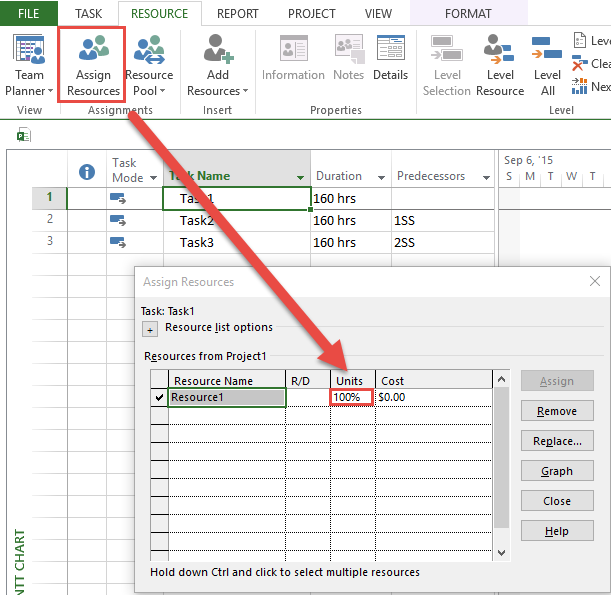
4. To assign the resource, click the
[Assign Resources] button within the Resource tab. Select each task and assign the resource with the default 100% Units.
For tasks across multiple enterprise projects within Project Server 2013: Follow-up our blog on cross-project dependencies (ADD LINK) or manually enter them with the steps below.
- Establish the tasks across the projects.
- Verify all the tasks are setup for Auto Schedule. To Auto Schedule, click on the Task tab, select all the tasks and click the Auto Schedule button
- Click the task for which you want to create a dependency to an external predecessor.
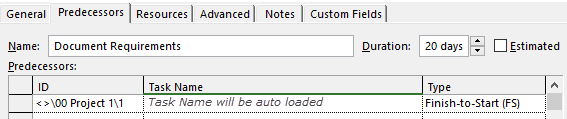
- Click Task Information Button image, and then click the Predecessors tab.
- In the ID column, type the project name and task ID number of the external predecessor, separated by a backslash. For example, type 00 Project 1\1 for task ID 1 in a file named 00 Project 1.
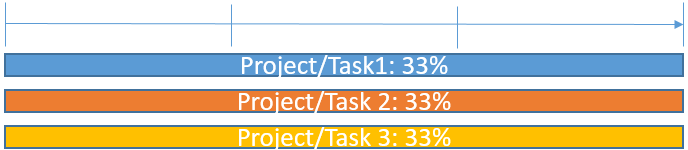
Option 2: Parallel task assignment.
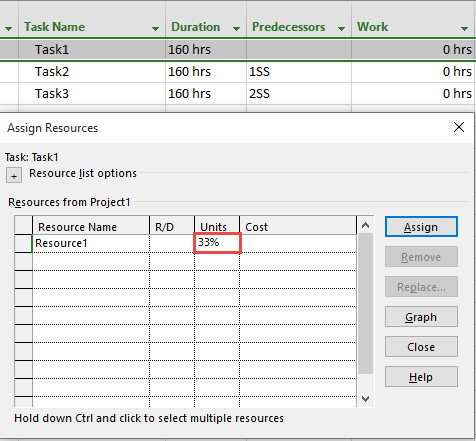
The act of attending to and processing all tasks simultaneously. The project/tasks are worked in parallel, with the resource spread across all three projects/tasks with a 33% allocation to each task.
Pros:
- You may inform your stakeholders that their tasks have all started on day 1.
- If you have uncontrolled holds in a project task, you can immediately refocus on another task in parallel until the other tasks are not on hold.
- All projects/tasks are scheduled to be completed at the end of the 3 month period
Cons:
- Resources that are spread across multiple tasks in the same day may have less efficiency as there is typically a lag in the shift from one task to another. In the end, the completion of all 3 tasks may take longer than 3 months.
Project Professional Configuration:
- Establish the tasks within the necessary project(s).
- Verify all the tasks are setup for Auto Schedule. To Auto Schedule, click on the Task tab, select all the tasks and click the Auto Schedule button.
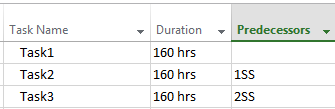
- Establish a predecessor rule for each task to start at the same time. Within the Predecessor column, apply the tasks with a Start-to-Start (SS) type.
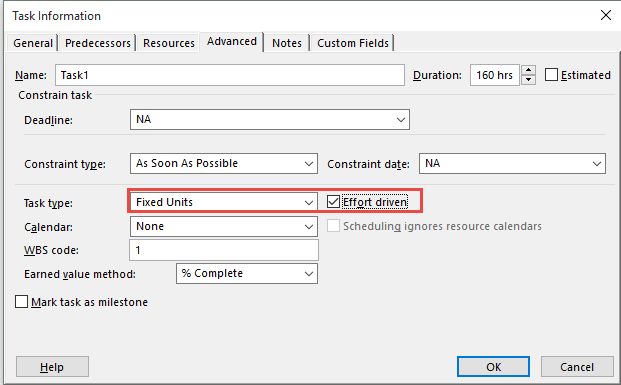
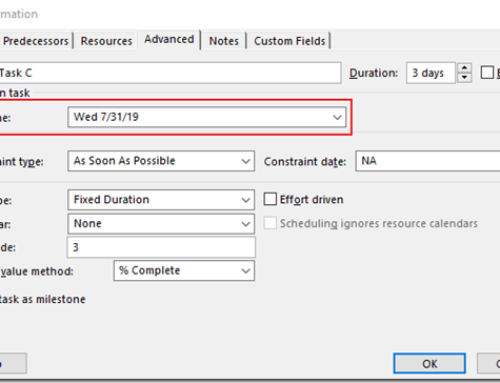
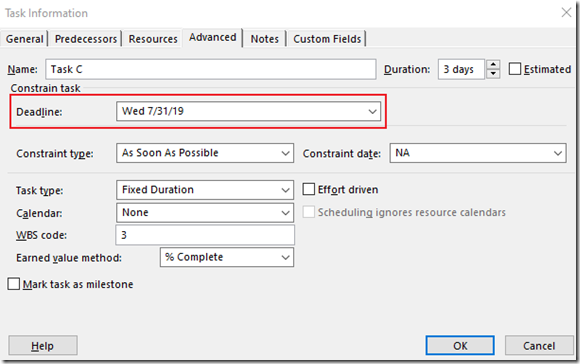
4. Enter the task Information by double clicking the task. Within the Task Information, access the Advanced Tab. Within the Advanced Tab, set the Task Type to Fixed Units and Effort driven.
This will maintain the fixed Work (160h) and apply the manually set assignment utilization percentage.
5. To assign the resource, click the [Assign Resources] button within the Resource tab. Select each task and assign the resource with a manually set 33% Units.
6. If necessary, update the Work column to ensure the estimated level of effort is accurately assigned to the task.
This will increase the Duration.
If the system provides a validation message on the task updates, be sure to select “Increase duration but keep the hours resources work per day (units) the same”.

Note: This is the setup of a project before the project starts. If there is Actual work already completed within a task, be sure the Actual Work column is updated and you put the correct remaining hours within the Remaining Work column.
Let us know your thoughts or contact us with any questions.


