Import Wizard to Import Projects into Project Server 2013
Project Server 2013, Importing Project, Import Wizard, Project Professional 2013
One of my favorite and quickest ways to import a project into Project Server 2013 is to use the Import Wizard.
Once you have scrubbed your project you and use the Use Import Wizard checkbox on the Save As page.

Step 1: Map Resources … again make sure you scrubbed your project if you have not. STOP and scrub your project before continuing. Trust me you will thank us.

When clicking on the Map Resources… link you will have the opportunity to map to the enterprise resources. Now if you did your Project Scrubbing correctly all your resources will map automatically. If not you will need to manual map from your local resource to an Enterprise resource.
For the purposes of this post – we left one local resource in the plan we were importing so you could see this window for all those that did not perform the Project Scrubbing steps.

Once all your resources are mapped to enterprise resources you can click on Continue to Step 2 link. Note it is important to map to enterprise resources for the governance of your system. You may need to discuss any new resources that are not in the enterprise pool with your PMO or admin to see if makes sense to add those resources to the enterprise or not.
Step 2: Validating and Importing Resources in this step you will validate that all your local resources are mapped to enterprise resources and you DO NOT NEED TO Import any resources.
For the purposes of this post – we left one local resource in the plan we were importing so you could see this window for all those that did not perform the Project Scrubbing steps.
Click the Validate Resources link.


You should see the following:
Number of local resources 0
Number of errors 0
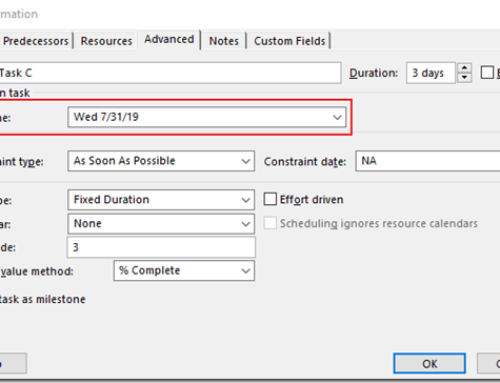
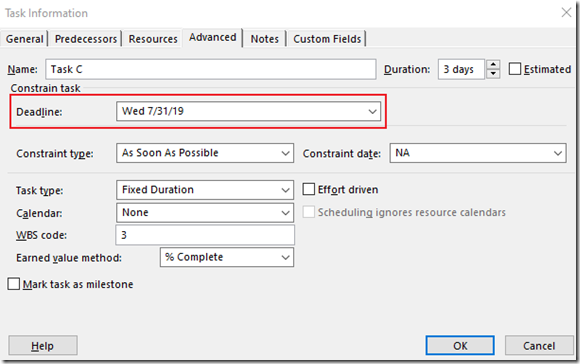
Next Continue to Step 3 link to Map local task custom fields to enterprise task custom fields in Project Web App. Please use enterprise task custom fields to follow the standards set by your organization.

Next Continue to Step 4 – and watch closely. It will show you all your tasks and if there are any errors. If there are no errors click on Continue to Step 4 AGAIN.

Step 5 …. MAKE SURE TO SAVE YOUR PROJECT. Many people just hit close and you did not actually import your project. Make sure to click on the Save link. This will bring up the Save to Project Web App window.


Enjoy and let us know if you have any comments or if you Need Training?

